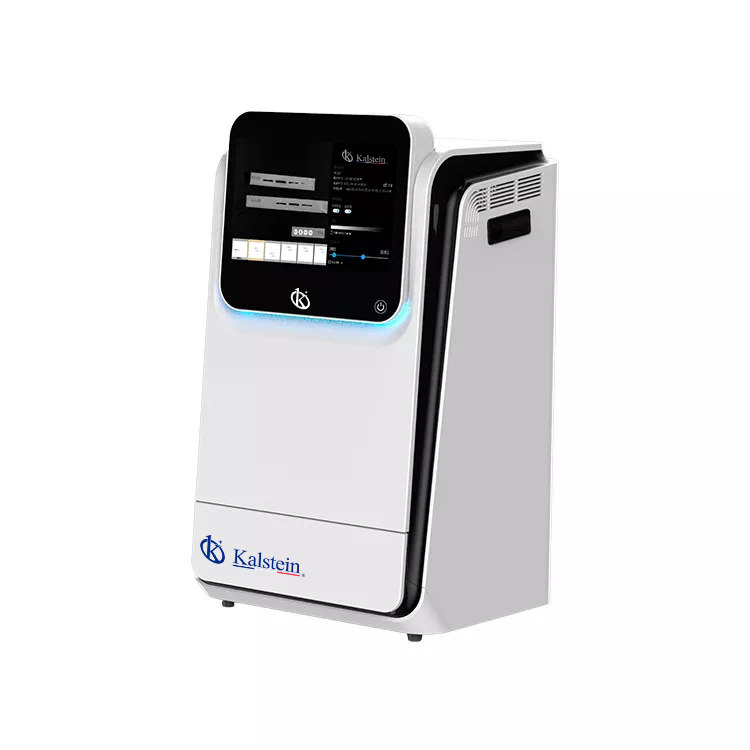
Installation and Commissioning Guide for the YR06210 Multifunctional Imager
The YR06210 Multifunctional Imager is designed for high performance in fluorescence and chemiluminescence detection. This guide focuses on the installation and commissioning of the YR06210, ensuring you achieve optimal performance and reliability from your device. Proper setup is crucial to ensure the accuracy of your results and the longevity of the equipment.
Understanding the YR06210 Multifunctional Imager
The YR06210 is equipped with a sensitive cooled digital camera that facilitates a broad range of applications including fluorescence imaging, chemiluminescence imaging, and gel documentation. Its electronic lifting platform allows users to adjust the capture area for various sample sizes efficiently. The device also features an optional removable PC, enhancing usability and data handling.
Technical Specifications of the YR06210
| Feature | Description |
|---|---|
| Model | YR06210 |
| Application | Chemiluminescence Imaging, Fluorescence Imaging, Gel Doc Application |
| Sensor | Back illuminated SCMOS Sensor |
| Resolution | 9.0 Megapixels |
| Dynamic Range | 4.8OD |
| Pixel Density | 16 bits (65536 Grey scales) |
| Optional Accessories | Epi-UV, RGB, and NIR fluorescent detection |
| Software | SHST Capture and Analysis Software for unlimited users |
Unboxing and Preparing for Installation
Upon receiving the YR06210, carefully unbox the equipment. Ensure that all components are present, including the imager, power supply, cables, and any optional accessories. Conduct a visual inspection for any shipping damage, and report any discrepancies to the supplier.
Site Requirements for YR06210 Installation
Before installation, ensure that the workspace meets the following requirements:
- Temperature: 18-25 °C
- Humidity: 40-60%
- Power Supply: 110-220V, 50/60Hz
- Clearance: At least 15 cm around the device for ventilation
- Stable Surface: Level and robust surface to accommodate the weight of 50 kg
Setting Up the YR06210
1. **Positioning:** Place the YR06210 on a stable, level surface according to the site requirements. Ensure there is adequate clearance for ventilation.
2. **Power Connection:** Connect the power supply to the device and then to the wall outlet. Make sure the voltage matches the specifications.
3. **First-Time Power-Up:** Press the power button to turn on the device. Allow it to initialize, which may take a few moments.
4. **Calibration Process:** Follow the on-screen instructions to perform the initial calibration of the imager. This ensures that the device is accurately measuring and capturing images.
Initial Software Setup
The YR06210 comes equipped with the SHST Capture and Analysis Software. Follow these steps for initial setup:
- Install the software from the provided media or downloadable file.
- Connect the removable PC if applicable, and ensure it is powered on.
- Follow the prompts to complete the installation process, including user registration and settings configuration.
Common Installation Mistakes to Avoid
To ensure a smooth installation, be aware of the following common pitfalls:
- Neglecting site requirements such as temperature and humidity, which can affect performance.
- Improperly leveling the imager, leading to inaccurate measurements.
- Skipping the initial calibration step, which is crucial for reliable results.
Frequently Asked Questions
What are the initial steps to take after unboxing the YR06210?
After unboxing the YR06210, inspect all components for damage and ensure all items are included. Follow the site requirements for temperature, humidity, and power before positioning the device for installation.
How do I calibrate the YR06210 for the first time?
To calibrate the YR06210, power on the device and follow the on-screen instructions to initiate the calibration process. It is important to complete this step for accurate imaging results.
What environmental conditions are optimal for the YR06210?
The optimal conditions for the YR06210 include a temperature range of 18-25 °C and 40-60% humidity. Proper ventilation and avoidance of direct sunlight are also recommended.
How can I troubleshoot if the device does not power on?
If the YR06210 does not power on, check the power connections, ensuring the outlet is functioning. If the problem persists, refer to the user manual for further troubleshooting steps.
What accessories are compatible with the YR06210?
Compatible accessories for the YR06210 include Epi-UV, RGB, and NIR fluorescent detection modules, as well as a removable PC for enhanced functionality.
Can I install the YR06210 without professional help?
Yes, the YR06210 is designed for user-friendly installation. However, following the installation guide carefully and ensuring compliance with site requirements is crucial for optimal performance.
How often should I perform maintenance on the YR06210?
Regular maintenance is recommended to ensure the longevity of the device. Follow the maintenance schedule outlined in the user manual, typically including cleaning the camera sensor and checking software updates.
If you are looking for a fusion of innovation and quality, you have come to the right place. At Kalstein, we offer you the luxury of exploring our exclusive catalog of laboratory equipment. We manufacture every device to the highest standards of excellence. Our intuitive and seamless online purchasing channels are designed for your convenience, securing the most competitive prices. Hesitate no longer — we bring science to life, it is time to become part of our community.